

Easy Honey Wheat Bread Recipe
Introduction
There’s something incredibly satisfying about the aroma of freshly baked bread filling your home. This honey wheat bread recipe captures that essence perfectly, offering a delightful blend of natural sweetness and wholesome goodness. Imagine slicing into a loaf that’s soft, fluffy, and bursting with the subtle flavor of honey. This recipe is more than just a baking project; it’s a journey back to simpler times, reminiscent of cozy kitchens and homemade comforts. Let’s dive into creating the perfect honey wheat bread recipe that will become a staple in your home.
Table of Contents
Why This Honey Wheat Bread Recipe Stands Out
Wholesome and Nutritious Ingredients
The key to any great recipe lies in the quality of its ingredients. For this honey wheat bread recipe, we’re focusing on wholesome, nutritious components that will make your bread stand out.
- Key Ingredients: Whole wheat flour, all-purpose flour, honey, yeast, warm water, milk, butter, and a pinch of salt.
- Nutritional Benefits: Whole wheat flour is rich in fiber, vitamins, and minerals, making this bread a healthier option compared to traditional white bread.
Simple yet Effective Techniques
Baking is both an art and a science, and mastering a few simple techniques can elevate your bread from good to extraordinary.
- Kneading: Proper kneading develops the gluten, giving your bread a soft and fluffy texture.
- Proofing: Allowing the dough to rise properly ensures a light and airy loaf.
- Baking Tips: Preheating your oven and using the correct baking temperature ensures even cooking and a perfect crust.
Ingredients for the Perfect Honey Wheat Bread
| Ingredient | Quantity |
|---|---|
| Whole wheat flour | 2 cups |
| All-purpose flour | 1 cup |
| Honey | 1/3 cup |
| Active dry yeast | 2 1/4 tsp |
| Warm water | 1/4 cup |
| Milk | 1 cup |
| Butter | 2 tbsp |
| Salt | 1 tsp |
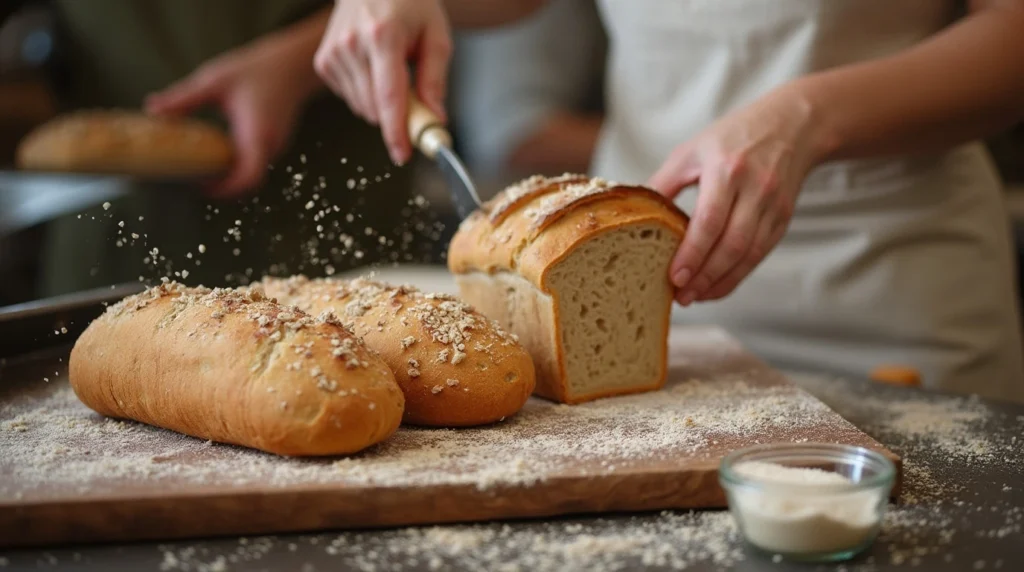
Step-by-Step Guide to Baking Delicious Honey Wheat Bread
Preparation
- Activate the Yeast: In a small bowl, mix the warm water, a pinch of sugar, and the yeast. Let it sit for 5-10 minutes until frothy.
- Combine Dry Ingredients: In a large bowl, mix the whole wheat flour, all-purpose flour, and salt.
- Mix Wet Ingredients: In another bowl, combine the milk, honey, and melted butter.
Kneading the Dough
- Form the Dough: Add the yeast mixture to the wet ingredients and pour this into the dry ingredients. Mix until a dough forms.
- Knead: Turn the dough out onto a floured surface and knead for about 10 minutes until smooth and elastic.
Proofing
- First Rise: Place the dough in a greased bowl, cover with a clean towel, and let it rise in a warm place for about 1 hour, or until doubled in size.
- Shape the Dough: Punch down the dough and shape it into a loaf. Place it in a greased loaf pan.
- Second Rise: Cover the pan and let the dough rise again for about 45 minutes, or until it has nearly doubled in size.
Baking
- Preheat Your Oven: Set your oven to 375°F (190°C).
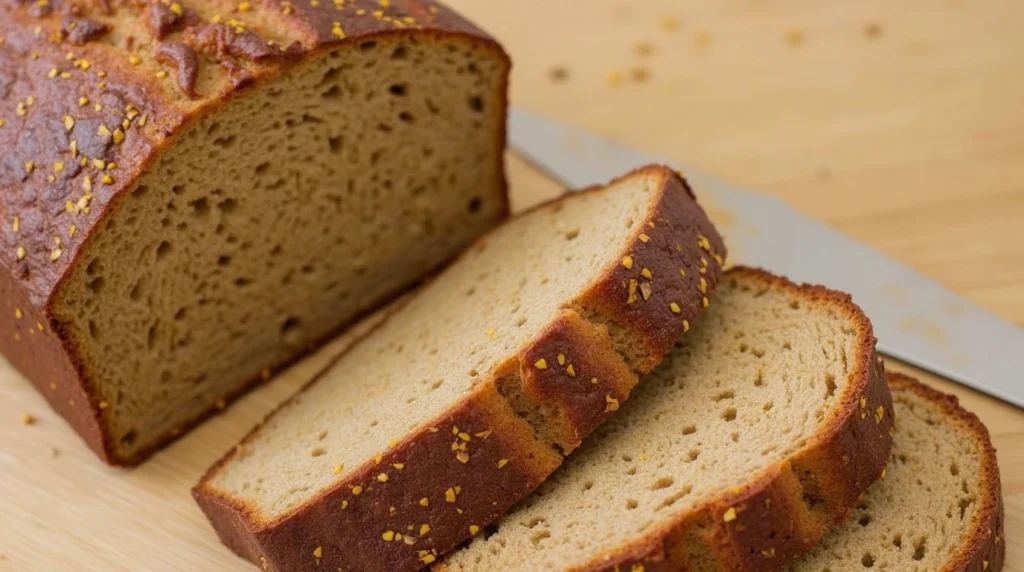
- Bake: Place the loaf pan in the preheated oven and bake for 30-35 minutes, or until the top is golden brown and the loaf sounds hollow when tapped.
Cooling and Serving
- Cool: Remove the bread from the oven and let it cool in the pan for 10 minutes. Then, transfer it to a wire rack to cool completely.
- Serve: Slice and enjoy your honey wheat bread with a spread of butter, a drizzle of honey, or your favorite jam.
Tips for the Best Honey Wheat Bread
Choosing the Right Flour
- Whole Wheat vs. All-Purpose: Using a combination of whole wheat and all-purpose flour gives the bread a balanced texture and flavor.
- Quality Matters: Opt for high-quality, freshly milled flour for the best results.
Storing Your Bread
- Room Temperature: Store the bread in an airtight container at room temperature for up to 3 days.
- Freezing: For longer storage, slice the bread and freeze the slices in a freezer-safe bag for up to 2 months.
Frequently Asked Questions (FAQ)
Can I use all whole wheat flour for this honey wheat bread recipe?
While you can use all whole wheat flour, it may result in a denser loaf. The combination of whole wheat and all-purpose flour provides a better balance of texture and flavor.
How do I know when my bread is done baking?
The bread is done when the top is golden brown and the loaf sounds hollow when tapped on the bottom. You can also use a thermometer to check the internal temperature, which should be around 190°F (88°C).
Can I make this honey wheat bread recipe vegan?
Yes, you can make this recipe vegan by substituting the milk with a plant-based milk and using a vegan butter alternative.
The Benefits of Homemade Bread
Health and Nutrition
Baking your own bread allows you to control the ingredients, ensuring that you’re consuming a product free from preservatives and artificial additives. Homemade bread is often more nutritious, as you can choose to incorporate whole grains, seeds, and other healthy ingredients.
Cost-Effectiveness
While the initial investment in ingredients may seem higher, baking your own bread can be more cost-effective in the long run. You can buy ingredients in bulk and use them for multiple batches, reducing the overall cost per loaf.
Environmental Impact
Homemade bread reduces packaging waste, as you’re not relying on store-bought loaves that come in plastic bags or wrappers. Additionally, you can source your ingredients locally, supporting sustainable farming practices and reducing your carbon footprint.
The Art of Bread Making
Understanding Gluten Development
Gluten is a protein found in wheat flour that gives bread its structure and elasticity. Proper kneading develops the gluten, creating a network that traps carbon dioxide released by the yeast, causing the dough to rise.
The Role of Yeast
Yeast is a living organism that feeds on the sugars in the dough, producing carbon dioxide and alcohol as byproducts. This process, known as fermentation, is what causes the dough to rise and gives bread its characteristic flavor.
The Importance of Proofing
Proofing, or allowing the dough to rise, is a crucial step in bread making. During this time, the yeast ferments the sugars, developing the bread’s flavor and texture. Proper proofing ensures a light, airy loaf with a delicate crumb.
Troubleshooting Common Bread Making Issues
Dense or Heavy Bread
- Cause: Overworking the dough or not allowing it to rise properly.
- Solution: Knead the dough gently and ensure it has enough time to rise in a warm, draft-free environment.
Bread Not Rising
- Cause: Expired yeast, cold temperatures, or not enough sugar for the yeast to feed on.
- Solution: Use fresh yeast, ensure your ingredients are at the right temperature, and add a pinch of sugar to activate the yeast.
Bread Too Dry or Crumbly
- Cause: Too much flour or not enough liquid.
- Solution: Adjust the flour-to-liquid ratio, adding more liquid if the dough is too dry or more flour if it’s too sticky.
Variations and Add-Ins
Seeds and Nuts
- Options: Sunflower seeds, pumpkin seeds, flaxseeds, walnuts, or almonds.
- How to Add: Sprinkle them on top of the loaf before baking or mix them into the dough.
Dried Fruits
- Options: Raisins, cranberries, or apricots.
- How to Add: Soak the dried fruits in warm water for 10 minutes, then drain and add to the dough during the final stages of kneading.
Herbs and Spices
- Options: Rosemary, thyme, cinnamon, or nutmeg.
- How to Add: Mix the herbs or spices into the dough or sprinkle them on top of the loaf before baking.
Advanced Bread Making Techniques
Sourdough Starter
- What It Is: A mixture of flour and water that captures wild yeast and bacteria from the environment, used to leaven bread.
- How to Make: Mix equal parts flour and water in a jar, leave it at room temperature, and feed it daily with more flour and water until it becomes bubbly and active.
Steam in the Oven
- Purpose: Creating steam in the oven helps develop a crispy crust and promotes oven spring, the final rise of the bread as it bakes.
- How to Do It: Place a shallow pan of water in the oven or spray the walls of the oven with water just before baking.
Scoring the Dough
- Purpose: Scoring, or making shallow cuts on the surface of the dough, allows the bread to expand evenly during baking and creates a visually appealing pattern.
- How to Do It: Use a sharp knife, lame, or razor blade to make quick, confident cuts on the surface of the dough just before baking.
The History of Bread Making
Ancient Origins
Bread making dates back to ancient civilizations, with evidence of flatbreads being made in Egypt and Mesopotamia as early as 10,000 BC. These early breads were likely unleavened, made from a simple mixture of ground grains and water.
The Rise of Leavened Bread
The discovery of leavening agents, such as yeast, revolutionized bread making. The ancient Egyptians are credited with developing the first leavened breads, using a sourdough-like starter to create lighter, more flavorful loaves.
Bread in Modern Times
Today, bread is a staple in cultures around the world, with countless variations and styles. From French baguettes to Indian naan, bread reflects the unique culinary traditions and preferences of different regions.
The Science of Bread Making
The Role of Enzymes
Enzymes, such as amylase and protease, play a crucial role in bread making. Amylase breaks down starches into sugars, providing food for the yeast, while protease helps develop the gluten structure.
The Maillard Reaction
The Maillard reaction is a chemical process that occurs when proteins and sugars react at high temperatures, creating the browned, flavorful crust on bread. This reaction is responsible for the distinctive aroma and taste of freshly baked bread.
The Impact of pH
The pH level of the dough affects the activity of enzymes and the final flavor of the bread. A slightly acidic environment, achieved through the use of sourdough or other acidic ingredients, can enhance the bread’s flavor and shelf life.
Bread Making Around the World
European Bread Traditions
- France: Known for its crusty baguettes and boules, French bread is characterized by its crisp crust and soft interior.
- Italy: Italian bread, such as ciabatta and focaccia, is often made with olive oil and herbs, reflecting the Mediterranean diet.
- Germany: German bread is renowned for its hearty, whole-grain loaves, such as pumpernickel and rye bread.
Asian Bread Traditions
- India: Indian bread, such as naan and roti, is typically unleavened and cooked on a griddle or in a tandoor oven.
- China: Chinese bread, such as mantou and baozi, is often steamed rather than baked, resulting in a soft, fluffy texture.
- Japan: Japanese bread, such as shokupan and anpan, is known for its soft, pillowy texture and sweet fillings.
African Bread Traditions
- Ethiopia: Injera, a sourdough flatbread made from teff flour, is a staple of Ethiopian cuisine, often served with stews and sauces.
- Morocco: Khobz, a round, flat bread, is a common accompaniment to Moroccan meals, often served with tagines and salads.
- South Africa: Vetkoek, a deep-fried bread dough, is a popular street food in South Africa, often filled with savory or sweet fillings.
The Future of Bread Making
Sustainable Practices
As awareness of environmental issues grows, so does the interest in sustainable bread making practices. This includes using locally sourced, organic ingredients, reducing food waste, and supporting fair trade practices.
Innovative Ingredients
Bread makers are increasingly experimenting with alternative ingredients, such as ancient grains, plant-based proteins, and fermented foods, to create unique and nutritious breads.
Technological Advances
Advances in technology are also shaping the future of bread making. From smart ovens that optimize baking conditions to apps that guide you through the bread making process, technology is making it easier than ever to bake the perfect loaf.
Conclusion
This honey wheat bread recipe is more than just a baking adventure; it’s a celebration of wholesome flavors that bring joy and comfort to your table. With natural sweetness from honey and the goodness of whole wheat flour, you can create a soft, fluffy, and delicious loaf of bread that will become a family favorite. So, tie on your apron, gather your ingredients, and let the baking begin!
Have you given our recipe a try ?
There are no reviews yet. Be the first one to write one.